For any number of reasons, you might need to keep an online meeting on schedule.1 Maybe you’re running a collaborative meeting, presiding in an online conference session, or teaching an online class. In any of these scenarios and others as well, your task might become much easier if there’s a timer everyone can see.
Video conferencing platforms don’t always make getting such timers a native function. But there’s an easy way to make such timers available across various video conferencing platforms. That is, you can add it to your own webcam feed. That way, if your webcam is showing, so is the timer.
What You Need
To add a timer to your webcam feed, you’ll need to be able to
- manipulate that feed. Here, I’ll assume you’re going to do so with the free and open OBS Studio.
- display a timer application on your desktop. Here, I’ll use Cook Timer Portable, another free and open source application. (I’ve tried using the built-in timer app in Windows 10, but I haven’t been able to get that to work.)
What to Do
To use these tools to set up your own on-webcam timer, just follow the steps below if you’re on Windows. If you’re using a Mac, feel free to comment below with any corresponding instructions that are different from what I describe here.
1. Download OBS Studio.
First, download OBS Studio. If you will want to use OBS across multiple machines, you may want to download the zipped version.
You’ll probably need to set up one “scene” (see below) on each machine unless you just happen to have the same webcam on both. But that’s another notch easier if you’re working with the same OBS environment than it will be if you have entirely separate installations.2
Assuming that you just go with the regular ZIP version directly from OBS, just unzip the file once it’s downloaded. That folder will then contain a full working version of OBS Studio.
2. Install the OBS virtual webcam.
Next, open the OBS Studio folder, but don’t start OBS quite yet. Instead, drill down in that folder to ~\data\obs-plugins\win-dshow\.
In that directory, you’ll see virtualcam-install.bat. Double click that file, and OBS will install itself as a virtual webcam.
3. Start OBS, and check that the virtual webcam installed properly.
Then, inside your OBS installation folder, go to ~\bin\64bit\. There, you’ll see obs64.exe. (Or this may be something like ~\bin\32bit\ and obs32.exe if you have a 32-bit version of Windows.)
That EXE file is the program you’ll open to start OBS. So, you might want to make a shortcut for it on your desktop or somewhere else easy to access.
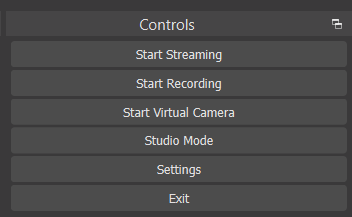
Once you’ve done so, go ahead and open this file to start OBS Studio. When you do, the “Controls” section in the bottom right corner should have a “Start Virtual Camera” button in it.
If that button isn’t there, something went wrong with your virtual webcam installation. To fix that,
- Close OBS Studio.
- Go back to
~\data\obs-plugins\win-dshow\. - Double click
virtualcam-uninstall.bat. - Double click
virtualcam-install.bat. And then - Reopen OBS Studio to check for the “Start Virtual Camera” button again.
4. Build your virtual camera scene.
Once you see the “Start Virtual Camera” button, all that’s left is for you to tell OBS Studio what you want to show as your virtual camera.
To do this, you’ll create a “scene.” You should already see one (named “Scene,” conveniently enough) in the “Scenes” section in the lower right corner.
At this point, to avoid anything wonky happening to your microphone, you might also want to mute both channels under the “Audio Mixer” section.
Once you’ve done that, you’ll want to add two items under the “Sources” section. The first is your actual webcam, the second is Cook Timer.
4.1. Add your webcam as a source.
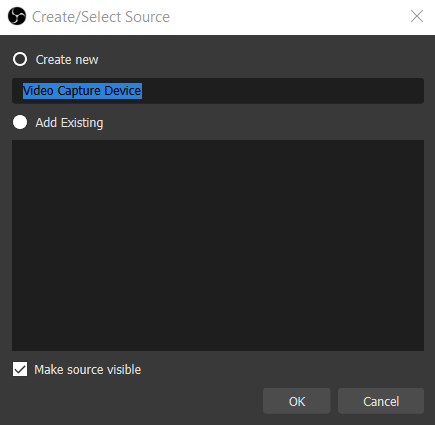
To add your webcam, click the + button at the bottom of the “Sources” section. You want to create a new source that you can name however you like, and then click OK.
OBS Studio will next display the a window for you to specify certain things about how it displays what it captures from your webcam. You shouldn’t need to adjust any of these settings, so just click OK again.
You’ll then see your webcam feed displayed in OBS Studio. Your feed might be a different size from the background. If so, go ahead and resize it to match.
That whole background area is what OBS Studio is going to display as your virtual camera. So, you don’t want to have your face half hanging off the edge of the screen or a big black L shape going around the sides of your all-too-small self.
4.2. Add Cook Timer as a source.
Next, open Cook Timer. Then, come back to OBS studio, click the + button under Sources, and select “Window Capture.” Name the window capture however you like, and click OK.
In the dropdown box for “Window,” find the entry for Cook Timer. Then, for “Window Match Priority,” choose “Match title, otherwise find window of same executable.”
Click OK, and you should now see Cook Timer overlaid on top of your webcam feed. You can move this box around so it isn’t overlapping anything it shouldn’t.
Whatever Cook Timer is displaying is what will display on your virtual camera feed. And you can use your virtual camera as it is at this point. But if you want, you can also clean up the timer to make it a bit less obtrusive.
4.3. Clean up how Cook Timer displays (optional).
In particular, you can
- crop down how much of Cook Timer displays in your virtual camera feed and
- turn cook timer’s grey background transparent.
To clean up how Cook Timer displays in these ways, right-click your Cook Timer entry under the “Sources” section. Then, choose “Filters.” You want to add two by clicking the + button at the bottom of the window and choosing
- “Crop/Pad.” For instance, if you want just the digital portion of the Cook Timer clock to display, crop from the top by 100, from the right by 200, and from the bottom by 90.
- “Color Key.” Select a “Key Color Type” of “Custom Color.” Then, click the “Select color” button, type
#f0f0f0, in the HTML field, and click OK.
5. Start, select, and test your virtual camera.
Once you’re satisfied with how things look in OBS Studio, click the “Start Virtual Camera” button. Then, open your preferred video conferencing application, and choose the “OBS Virtual Camera” webcam option.
Start Cook Timer on at a timer of at least a few minutes. Then, have a look at how others are going to see you in your video conferencing application.
If you, Cook Timer’s numbers, or both are “backwards,” you can fix that easily in OBS Studio. For any source that’s appearing backwards,
- Right click that source under the “Sources” section in OBS Studio.
- Go to “Transform,” and
- Choose to “Flip Horizontal.”
OBS Studio will then make the change, and you should see the result immediately in your video conferencing application.
Conclusion
When you move a meeting from in-person to online, there are several downstream consequences of the fact that not everyone is all together in the same room.
That fact can make it harder to keep time for a presentation or a particular part of a session. Or more accurately, it can make it hard to communicate that time is drawing close without some of the usually subtle social cues that can be used in person.
As a substitute, displaying a timer directly on your webcam feed can be a helpful way of keeping things on track. But it’s actually something you can do with just a few steps that don’t require you to purchase specific, preset video backgrounds or the like.
Header image provided by Compare Fibre. ↩
OBS Studio is also available through the same PortableApps framework that Cook Timer is. But that version doesn’t have the virtual webcam components you’ll need. So, if you want to use OBS Studio in PortableApps, you’ll want to grab the zipped version directly from the OBS website as well. For discussion, see this OBS support forum thread. ↩


Leave a Reply